Trying to print a full helmet STL model or large 3D printed prop in one piece? That’s where most 3D printing projects fail.
When working with large STL models like helmets, armor, or cosplay props, the goal isn’t to fit everything on your build plate—it’s to break the model down into smaller, manageable parts that can be printed reliably and assembled later into a complete piece.
Dividing a model this way doesn’t just solve size limitations. It also improves print quality, reduces support marks, makes complex shapes easier to handle, and lowers the risk of long failed prints.
Printing in multiple parts also gives you more control over the final result. You can reinforce specific areas, adjust orientation for better surface finish, and prepare parts for easier sanding and painting.
However, once a model is split, the focus shifts to assembly. The way parts are aligned, joined, and finished will directly impact the strength, durability, and overall look of the final model.
- Adhesive assembly: Ideal for helmets, cosplay props, and display pieces where clean seams and smooth finishes are the priority.
- Mechanical assembly: Useful for functional parts or projects that need stronger connections or the ability to be disassembled.
In this guide, you’ll follow a complete workflow for printing large STL models successfully—from preparing and splitting your files to assembling and finishing them with a professional result.
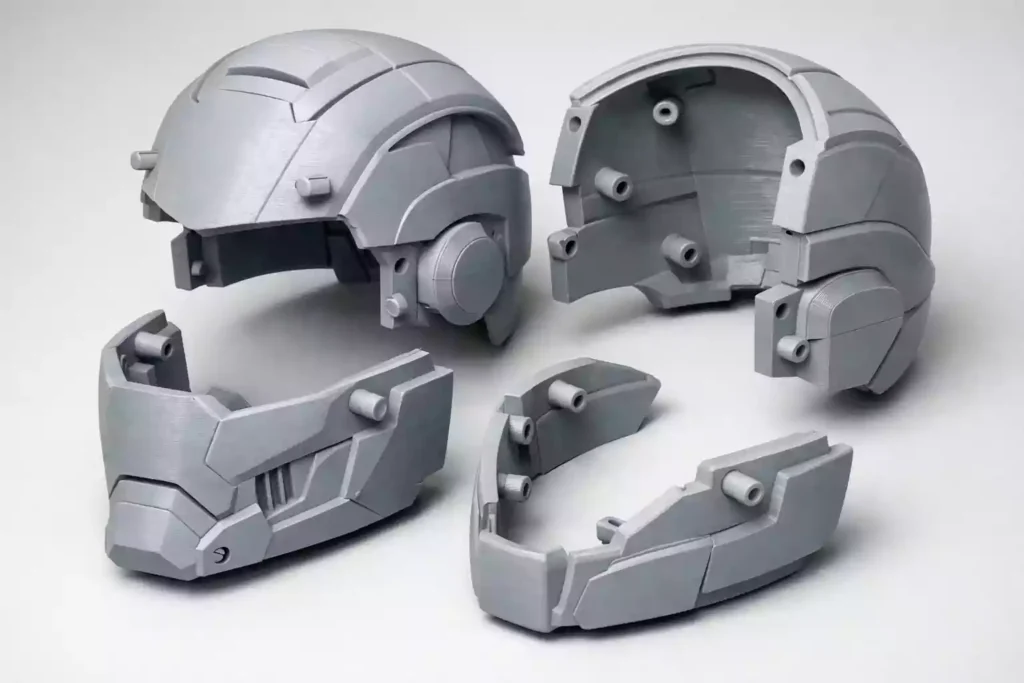
1. Split Your STL Model Strategically
When printing large STL models like helmets, armor, or props, splitting the model into multiple parts is not optional—it’s essential for both print success and final quality.
There are two main approaches you can use when splitting your model:
- Add alignment features to guide assembly
- Use simple cuts and align parts manually
If your model includes many pieces, it’s also helpful to label them (numbers or letters) to make the assembly process faster and more organized. Most modern slicers like Ultimaker Cura and PrusaSlicer allow you to prepare and manage parts efficiently before printing.
Add Alignment Features (Best for Clean Results)
This method involves modifying your STL model to include features that help parts fit together precisely.
Common alignment options include:
- Pins and holes
- Slots and grooves
- Flat interlocking surfaces
These features make assembly easier by automatically positioning parts correctly, reducing the chance of misalignment and uneven seams. This is especially useful for helmet STL models or detailed cosplay props, where symmetry and precision are important.
However, alignment systems depend on how accurate your printer is. If parts are slightly warped or not dimensionally precise, they may not fit together perfectly. In that case, you’ll need to sand or adjust them manually during assembly.
Use Straight Cuts (More Flexible Approach)
The second method is to split your model using simple, straight cuts without adding alignment features.
This approach is easier to prepare and works well with most printers, especially when printing large parts that may have small variations. Straight cuts are also more forgiving because you can manually adjust each part during assembly.
If you’re printing models from a collection of ready-made files, such as a helmet STL files collection → /helmet-stl-files, you’ll often find that parts are already split in a way that supports this method.
The main drawback is that alignment takes more time. You’ll need to carefully position each piece and hold it in place while the adhesive bonds, which can slow down the process.
Choosing the Right Method
The best approach depends on your printer and your project.
- Use alignment features if you want precision and cleaner seams
- Use straight cuts if you want flexibility and easier assembly
For most users printing large 3D models, starting with simple cuts is often more reliable. As you gain experience and improve your print accuracy, adding alignment systems becomes a powerful way to improve your results.
2. Optimize Your Print Settings for Large Models
Balanced Settings That Actually Work
When printing large STL models, your settings need to balance strength, quality, and print time. Small mistakes that don’t matter on small prints can cause failures on long prints.
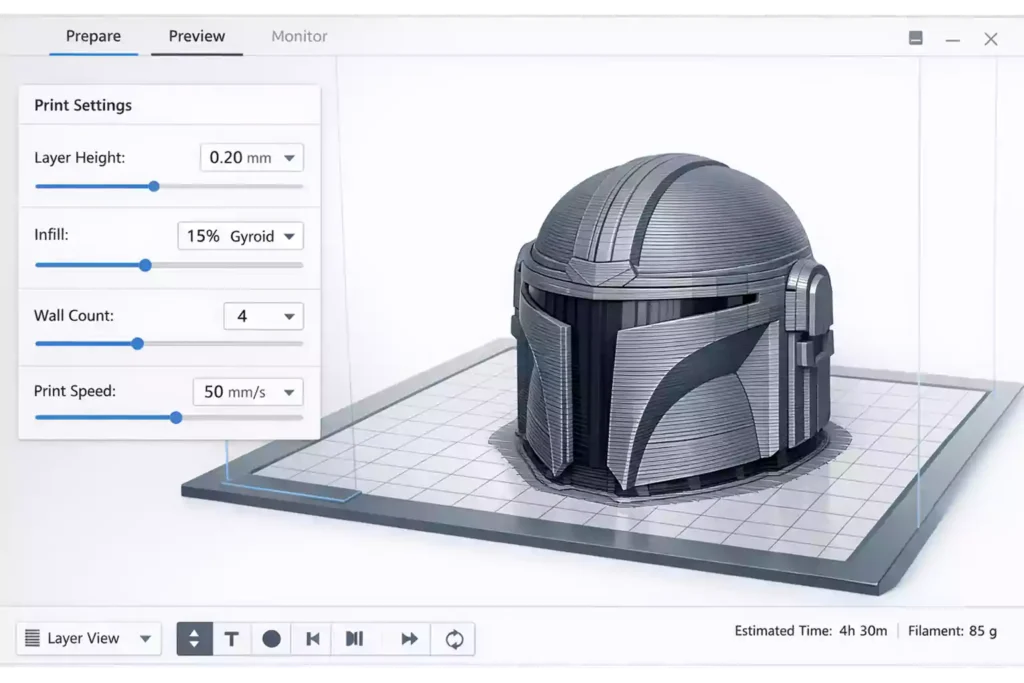
A reliable setup for helmets, armor, and props:
- Layer height: 0.2 mm
- Infill: 10–20% (gyroid recommended)
- Walls: 3–4 (very important)
- Speed: 40–60 mm/s
These settings give you strong parts without making prints unnecessarily long.
Focus on Walls, Not Infill
In large 3D printed models, strength comes mainly from the outer shell.
- More walls = stronger parts
- More infill = longer print time (not much stronger)
👉 A model with 4 walls and 15% infill is usually better than 2 walls and 40% infill.
Small Adjustments That Make a Big Difference
A few simple tweaks can improve your results:
- Slow down outer walls for better surface finish
- Increase top layers for stronger surfaces
- Reduce speed slightly on tall prints for stability
Common Mistakes to Avoid
- Printing too fast → weak layers
- Using low wall count → cracks during sanding
- Increasing infill instead of walls
- Not adjusting settings for large parts
👉 Good settings don’t slow you down—they prevent failed prints.
5. Bonding the Parts (Assembly Techniques)
Once your large STL models—such as helmets, armor, or props—are printed and cleaned, the next step is assembling and bonding the parts. The method you choose will directly affect the strength, alignment, and final appearance of your model.
Comparison of Bonding Methods
| Method | Best For | Strength | Working Time |
|---|---|---|---|
| Epoxy | Large parts (helmets, armor) | High | Medium |
| Super Glue (CA) | Small / medium parts | Medium | Fast |
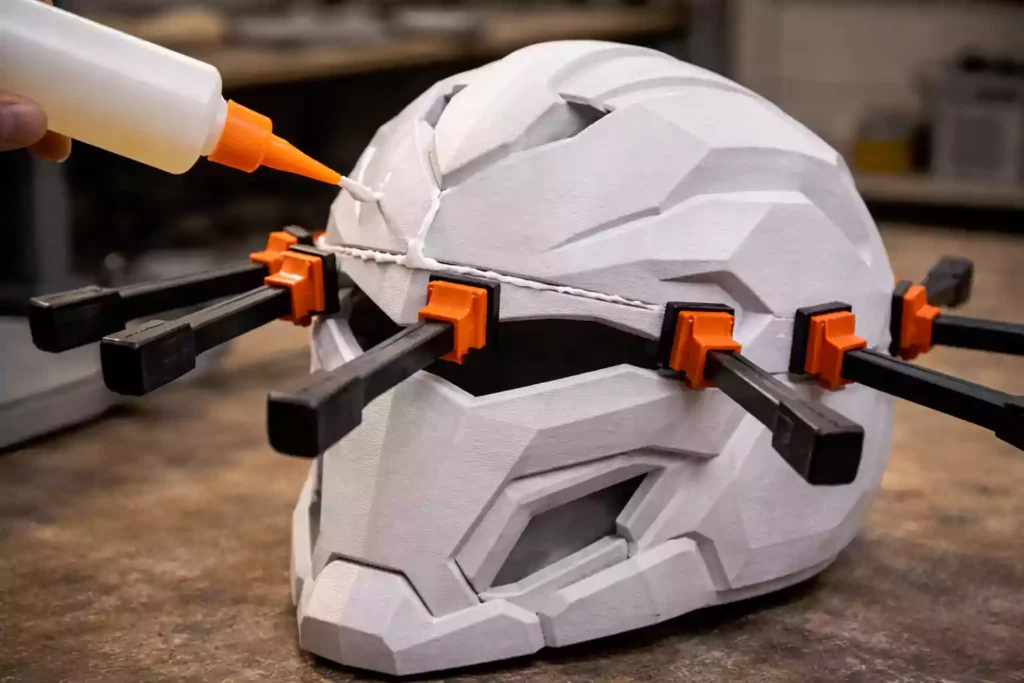
Epoxy (Best for Large Parts)
Epoxy is the most reliable option for bonding large sections like helmet halves or armor pieces. It creates a strong, durable connection and gives you time to adjust alignment before it fully sets.
This makes it ideal for parts that need precision and will be handled or worn.
👉 Best choice for strength and clean assembly.
Super Glue (Fast and Practical)
Super glue is useful for smaller parts or quick fixes. It bonds almost instantly, which makes it convenient, but leaves very little time for adjustment.
It’s best suited for lightweight parts or for temporarily holding pieces in place before applying a stronger adhesive.
👉 Best for speed, not for high-stress areas.
Getting Clean and Strong Results
To achieve a professional finish:
- Dry fit all parts before applying adhesive
- Sand contact surfaces for better bonding
- Hold or clamp parts until fully set
Even small misalignments will be visible after painting, so take your time during this step.
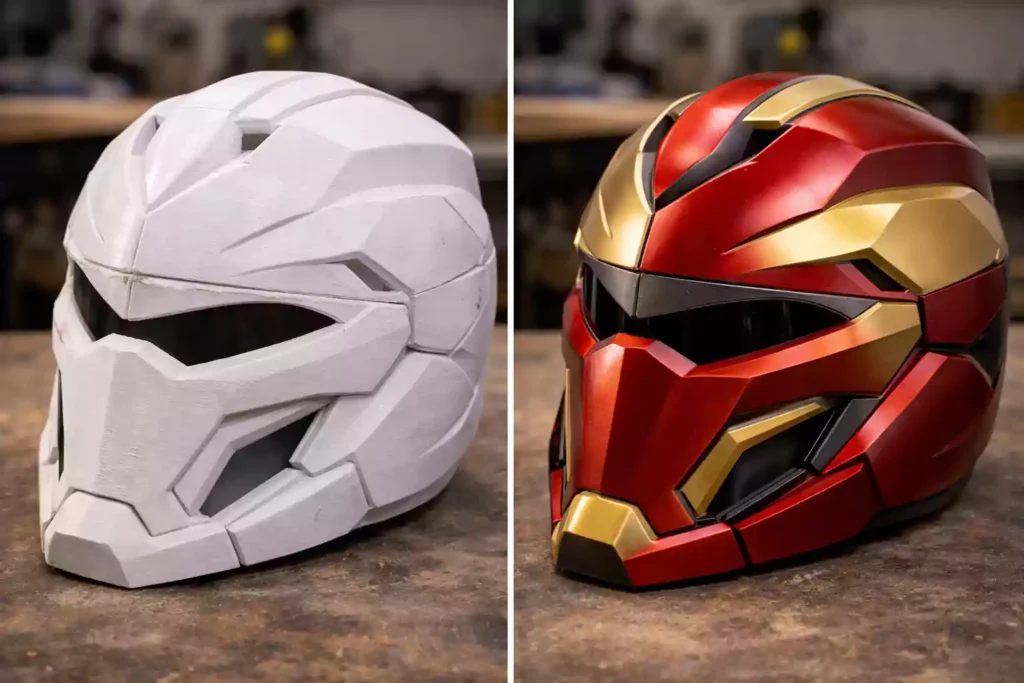
Post-Processing and Finishing the Parts
Once your large STL models are printed and assembled, post-processing is what transforms them from raw prints into clean, professional-looking 3D printed helmets, armor, and props.
Smoothing and Surface Preparation
Raw 3D prints often show visible layer lines and seams, especially on large surfaces. To improve the final surface finish, sanding is essential.
Start with coarse sandpaper (around 120 grit) to remove layer lines, then move to finer grits (220 → 400) for a smooth result. Pay special attention to seams created during assembly, as these areas require extra work to blend properly.
Priming for a Clean Finish
After sanding, applying a primer for 3D prints helps reveal imperfections and prepares the surface for painting.
A good primer is especially useful for 3D printed parts, as it fills small layer lines and surface defects that sanding alone can’t completely remove. It also improves paint adhesion and creates a smoother, more uniform base for finishing .
Apply light, even coats and allow proper drying time between layers. For best results, lightly sand the surface after each coat to improve adhesion and achieve a cleaner surface finish before painting.
Painting Your 3D Printed Model
Painting is where your model comes to life. Whether you’re working on a helmet STL model or detailed cosplay props, use multiple thin coats for the best results.
- Spray paint for even coverage
- Airbrush for detailed work
- Matte or gloss finish depending on the style
Avoid thick layers, as they can hide details and create uneven surfaces.
Pro Tips for a Professional Finish
- Sand between each layer of primer and paint
- Use masking for clean edges and details
- Take your time—rushing this step reduces quality
👉 If you’re using high-quality models like premium helmet and cosplay STL files → /premium-stl-files, clean geometry makes post-processing much easier and faster.
Conclusion
Printing large STL models like helmets, armor, and cosplay props isn’t just about having the right 3D printer—it’s about following the right process.
By planning your cuts, optimizing your print settings, preventing warping, and using proper bonding and post-processing techniques, you can avoid common failures and achieve clean, professional results.
The biggest difference comes from preparation. Small improvements in setup, file quality, and finishing steps can save hours of work and significantly improve the final look of your 3D printed models.
👉 If you want to simplify the process, starting with well-designed files—like helmet and cosplay STL files can make printing, assembly, and finishing much easier from the beginning.
With the right workflow, you’ll be able to create strong, detailed, and high-quality prints with confidence.