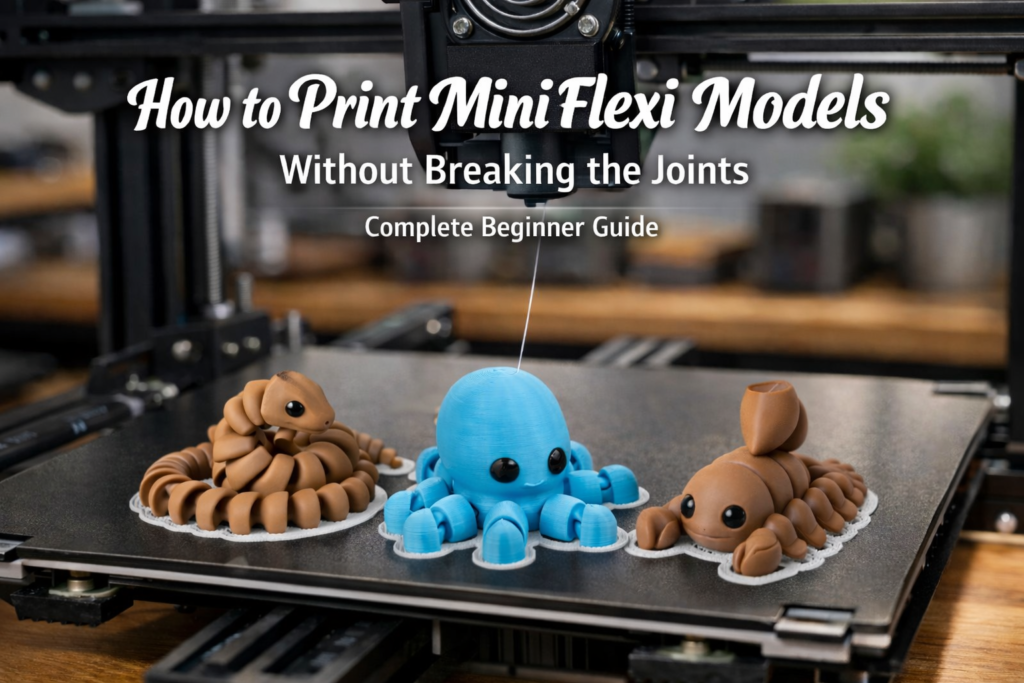
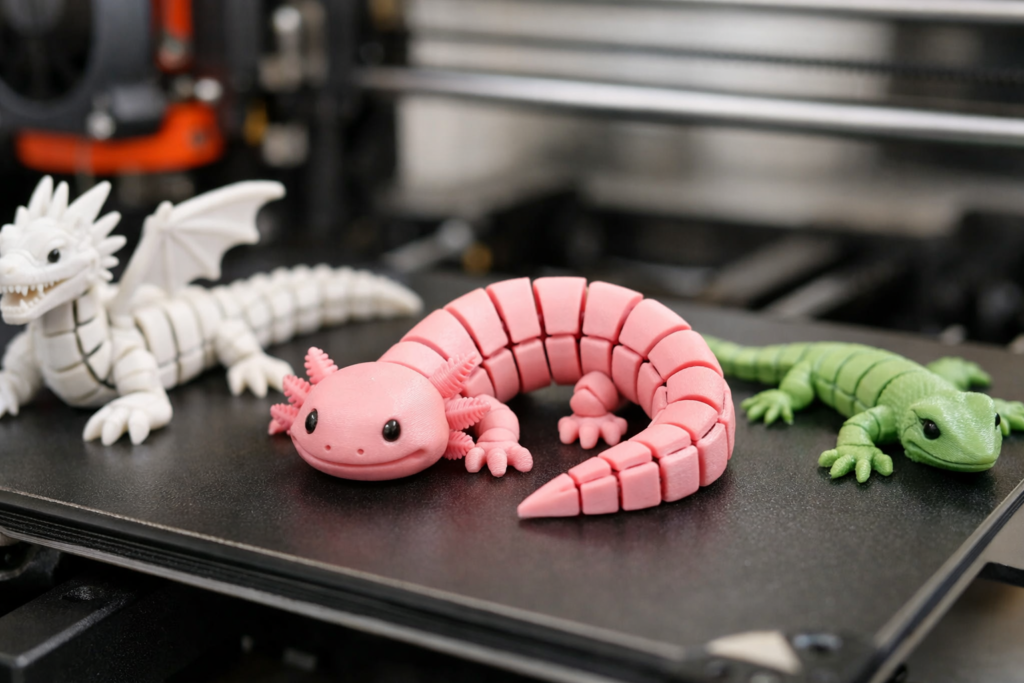
Mini flexi STL models are some of the most popular print in place models in the 3D printing community. Their articulated design allows each segment to move freely straight off the build plate, making them a fun and satisfying articulated 3D print for beginners and experienced makers alike.
However, printing small flexi STL models successfully requires precise 3D printer settings. Because these models rely on tight tolerances between moving joints, incorrect flow rate, speed, or PLA printing settings can easily cause fused joints or stiff movement.
In this guide, you’ll learn how to print flexi STL models correctly, avoid common joint problems, and optimize your 3D printing settings for smooth, flexible results every time.
Why Do Mini Flexi STL Model Joints Break or Fuse?
Mini flexi STL models are a type of print-in-place 3D print designed with very small gaps between each articulated segment. These tight tolerances allow the joints to move freely without assembly, making them one of the most popular articulated 3D print models in the 3D printing community.
However, because the spacing between parts is minimal, incorrect 3D printer settings can easily cause problems. If your flow rate is too high, your PLA temperature settings are not calibrated correctly, or your print speed is too aggressive, excess material can fill the joint gaps. This leads to fused joints, stiff articulation, or a flexi model that does not move at all.
Another common issue in FDM 3D printing is excessive first-layer compression, often called the elephant’s foot effect. When the first layer is squished too much, the lower joints of the print-in-place model can fuse together, reducing flexibility and damaging overall 3D print quality.
Since mini flexi STL models are smaller than standard articulated prints, the tolerances are even tighter. That’s why proper 3D printing calibration, optimized Cura settings, and controlled extrusion are critical for achieving smooth joint movement.
Best 3D Printer Settings for Mini Flexi STL Models
Mini flexi STL models require precise 3D printer settings to achieve smooth articulation and prevent fused joints. Because these are print-in-place models with tight tolerances, even small calibration issues can affect movement and overall 3D print quality. Optimizing your slicer profile — whether you use Cura settings, PrusaSlicer, or another slicer — is essential for clean, flexible results.
Below are the most important settings to adjust when printing mini articulated 3D print models.
A. Layer Height
For mini flexi STL models, a layer height between 0.16mm and 0.2mm works best. Smaller layer heights improve precision and help preserve the tiny gaps between articulated joints. Using thick layers can reduce detail and increase the chance of joint fusion in small articulated 3D print designs.
If you’re aiming for maximum flexibility and smoother surfaces, 0.16mm is ideal. For faster prints while maintaining quality, 0.2mm is a safe choice.
B. Print Speed
Printing too fast is one of the most common causes of flexi model joints stuck after printing. For small print-in-place models, keep your print speed between 40–50mm/s.
Slower speeds allow the extruder to deposit filament more accurately, especially in tight curves and small articulated sections. Reducing speed improves dimensional accuracy and helps maintain proper spacing between joints.
C. Flow Rate (Extrusion Multiplier)
Over-extrusion is the number one reason flexi STL models fuse together. If too much filament is extruded, the small gaps between moving parts will close.
Set your flow rate (extrusion multiplier) between 95% and 100%, depending on your printer calibration. If you frequently experience fused joints or stiff articulation, slightly reducing the flow rate can dramatically improve movement.
Proper extrusion control is critical for high-quality print-in-place articulated prints.
D. Nozzle Temperature (PLA Printing Settings)
For most mini flexi STL models printed in PLA, a temperature range of 200–210°C is ideal.
If the temperature is too high:
- Filament becomes too soft
- Material spreads more
- Joint gaps may fill in
Lowering the temperature slightly can reduce stringing and improve joint precision. Always test your PLA printing settings using a small calibration print before printing detailed articulated models.
E. First Layer Settings (Elephant’s Foot Prevention)
The first layer is extremely important for mini articulated models. Excessive first-layer squish — also known as the elephant’s foot effect — can fuse the bottom joints of your flexi STL model.
To prevent this:
- Adjust your Z-offset carefully
- Avoid overly aggressive bed adhesion
- Slightly reduce first-layer flow if needed
Good first-layer calibration ensures the joints near the base remain free and functional.
F. Cooling & Fan Speed
Proper cooling improves precision and helps maintain small articulated gaps. When printing PLA, set your cooling fan to 100% after the first few layers.
Strong cooling:
- Improves dimensional accuracy
- Reduces excess filament spreading
- Helps preserve joint clearance
Cooling plays a major role in achieving smooth movement in small articulated 3D print models.
Recommended Starting Profile for Mini Flexi STL Models
Here’s a safe baseline profile for most FDM 3D printing setups:
- Layer Height: 0.16–0.2mm
- Print Speed: 40–50mm/s
- Flow Rate: 95–100%
- Nozzle Temperature (PLA): 200–210°C
- Cooling Fan: 100% after first layers
These optimized 3D printer settings will significantly reduce the risk of fused joints and improve overall articulation quality.
How to Improve Articulation and Prevent Stuck Flexi Joints
Mini flexi STL models are designed as print-in-place articulated 3D prints, which means the joints should move freely right after printing. However, even with optimized 3D printer settings, small calibration adjustments can dramatically improve flexibility and overall 3D print quality.
If your flexi model joints feel stiff or partially fused, the issue is often related to precision, spacing, or minor over-extrusion. Improving articulation requires fine-tuning both your slicer settings and your printer calibration.
Best Filament for Mini Flexi STL Models
Choosing the right filament plays a major role in achieving smooth articulation and strong durability when printing mini flexi STL models. Because these print-in-place models rely on precise joint spacing, the material you use can directly impact flexibility, surface finish, and overall 3D print quality.
Below are the best filament options for mini articulated 3D print models.
A. Standard PLA (Best Overall Choice)
Standard PLA is the most reliable and beginner-friendly option for printing flexi STL models. It offers:
- Excellent dimensional accuracy
- Easy printing with stable PLA temperature settings
- Minimal warping
- Clean articulated joint movement
For most FDM 3D printing setups, PLA provides the best balance between detail and ease of use. If your goal is consistent results and smooth print-in-place articulation, standard PLA is the safest choice. Many users prefer trusted brands like eSUN PLA for consistent extrusion and reliable performance.
B. Silk PLA (Best for Visual Appeal)
PLA+ is a modified version of PLA designed for improved strength and impact resistance. It’s a good option if:
- You want more durable articulated joints
- The model will be handled frequently
- You need slightly better layer bonding
PLA+ can improve joint durability while still maintaining the precision needed for mini flexi STL models. High-quality options such as eSUN PLA+ are commonly used for stronger articulated prints.
C. PLA+ (Stronger & More Durable)
PLA+ is a modified version of PLA designed for improved strength and impact resistance. It’s a good option if:
- You want more durable articulated joints
- The model will be handled frequently
- You need slightly better layer bonding
PLA+ can improve joint durability while still maintaining the precision needed for mini flexi STL models.
D. TPU (For Advanced Users Only)
TPU is a flexible filament that creates soft, bendable prints. While it may seem ideal for flexi models, it is not recommended for beginners.
Because TPU is elastic, printing small articulated 3D prints can be challenging. It requires slower print speeds and advanced extrusion control. Only experienced users with well-calibrated printers should attempt TPU for mini flexi STL models.
Recommended Filament for Beginners
If you’re new to printing flexi STL models, start with:
- Standard PLA
- Proper cooling settings
- Controlled flow rate
This combination provides the most reliable results for print-in-place articulated models.
How to Fix a Flexi STL Model with Fused Joints
Even with optimized 3D printer settings, it’s possible for mini flexi STL models to come off the build plate with partially fused or stiff joints. Fortunately, in many cases, you can restore articulation without reprinting the entire model.
Below are safe and effective methods to fix fused joints in print-in-place articulated 3D prints.
A. Gently Flex the Joints by Hand
The simplest solution is often the most effective.
Carefully bend each articulated section back and forth with steady, controlled pressure. Many flexi STL models only have light fusion caused by minor over-extrusion, and gentle movement can break the thin excess filament between segments.
⚠ Avoid twisting aggressively, as small articulated parts can snap.
B. Use a Thin Plastic Tool or Blade (Carefully)
If the joints remain stuck, you can carefully insert a thin plastic tool or hobby blade between the segments to remove small bits of fused filament.
This method works best when:
- The joint gap is visible
- Fusion is minimal
- The model is printed in PLA
Work slowly and avoid damaging the articulated structure.
C. Slightly Trim Excess Filament
Sometimes small blobs or stringing cause limited movement. Using precision cutters or a hobby knife, gently remove visible excess material from around the joint areas.
Improving surface cleanup can restore movement in mini articulated 3D print models.
D. Adjust Your Settings Before Reprinting
If the joints are fully fused and cannot be repaired, reprinting may be necessary. Before reprinting your flexi STL model:
- Reduce flow rate to 95–98%
- Lower nozzle temperature slightly
- Reduce print speed
- Improve 3D printer calibration
- Check first-layer squish (Z-offset)
These adjustments significantly reduce the chance of fused joints in print-in-place models.
E. Prevent the Problem in Future Prints
To consistently avoid fused joints in mini flexi STL models:
- Use proper PLA printing settings
- Ensure accurate extrusion calibration
- Enable strong cooling after initial layers
- Keep print speeds moderate
- Regularly level your print bed
Prevention is always easier than fixing a failed articulated 3D print.
Where to Download High-Quality Mini Flexi STL Models
The quality of your results depends not only on your 3D printer settings, but also on the STL file design. Well-optimized mini flexi STL models with proper joint tolerances print more reliably and produce smoother articulation.
If you’re looking for print-ready articulated designs, explore our collection of mini flexi STL models here:
Conclusion
Printing mini flexi STL models successfully requires the right 3D printer settings, proper calibration, and high-quality print-in-place designs. By optimizing flow rate, speed, temperature, and first-layer settings, you can prevent fused joints and achieve smooth, flexible articulation every time.
With careful setup and well-designed STL files, mini articulated models can become some of the most reliable and satisfying 3D prints you create.